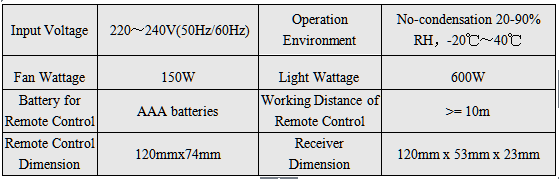
-
Good for all ceiling fans;
-
Two load outputs one for controlling the fan and another one for controlling the lights;
-
Three fan speeds;
-
Precise timer function(on phone operation);
-
ABS-V0 flame resistance material;and
-
Elegant design and high quality build.
-
- Wiring Diagram and Installation Guide:
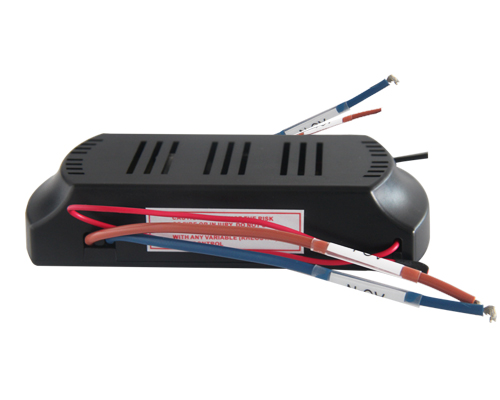
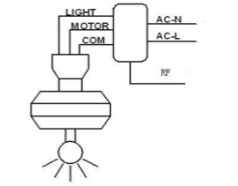
uCF691 remote control unit is battery driven and there is no wiring requirement. The receiver has its all connection wires clearly labelled as shown in Fig. 4.
Fig. 4 uCF691 Receiver Wiring Diagram
AC-L: Connected to the hot wire of power supply
AC-N: Connected to the neutral wire of power supply
Light: Connected to the lights
Motor: Connected to the fan
COM: Connected to the neutral wire of the fan and/or lights
RF: Antenna no connection
Warning: Please make sure power is turned off before starting installation!
Once properly wired the uCF691 receiver can be installed into the canopy of the ceiling fan as shown in Fig. 5.

Setup and Operation Guide:
1. Setup and Operation of uCF691 Remote Control Unit:
There is a dip switch on the back of uCF691 remote control unit and there is a dip switch on the side of uCF691 receiver. Set these two dip switches to identical positions. The remote control unit will be able to send commands to the receiver and read the status from the receiver.
1.1 Change fan speed: Pressing the fan speed control button will turn on or turn off the fan. When the fan is on pressing the speed button “HI/MED/LOW” the fan speed will be changed into high speed middle speed and low speed respectively.
1.2 Turn on or turn off the light: Pressing the light control button will turn on or turn off the lights.
2. Setup and Operation of Smart Phone:
Please follow the instruction comes with the ceiling fan remote control kit to download a smart phone App from the designated website. The steps of setting up the App are as follows:
2.1 Turn on the power to the ceiling fan. Load the App into smart phone and launch the App;

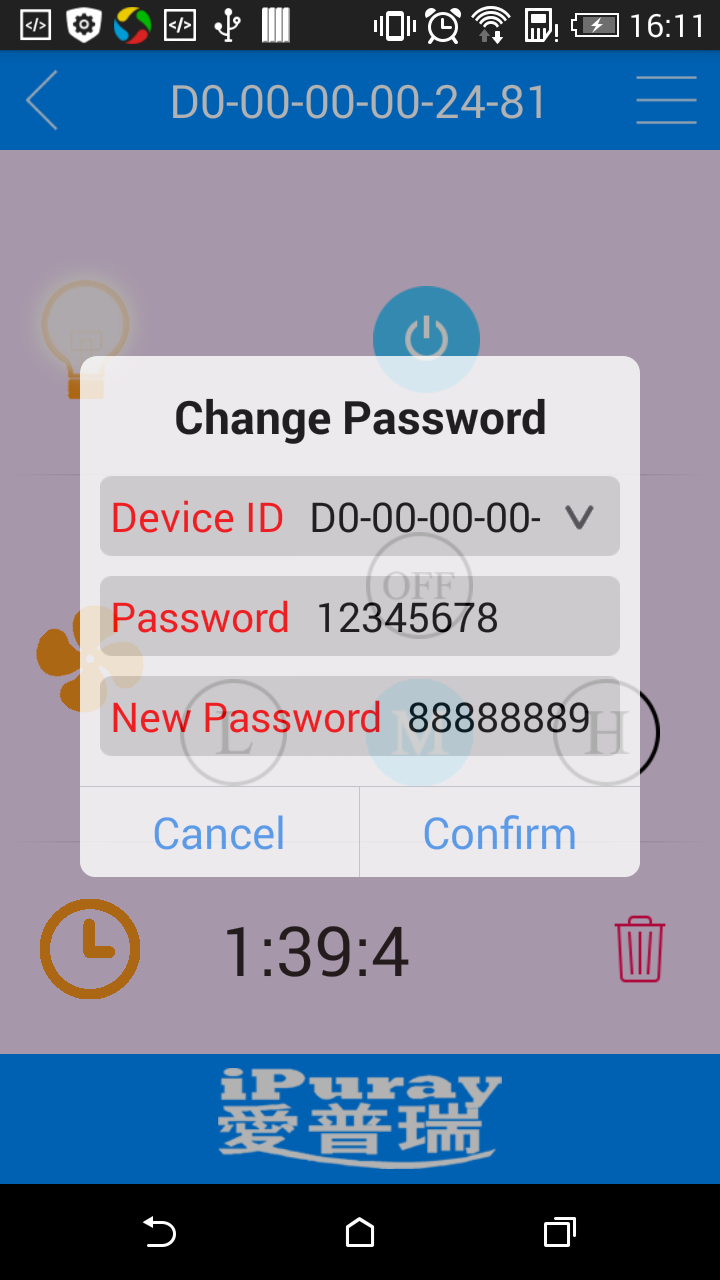
2.2 Click “Add Device” button enter Device ID and Password. Every receiver has a unique ID assigned at factory and the default Password is 12345678. The password can be changed by the user once the initial setup and operation are completed.
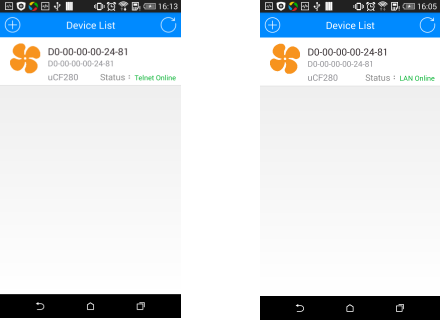
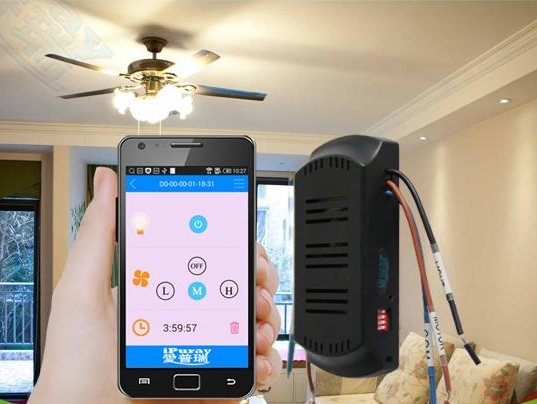
2.3 Press “Confirm” button to link the ceiling fan. If the setup is successful the status will show “Device Online”. In case “Device Online” is not shown press the Refresh button (a circle with an arrow at the top-right-corner). Once “Device Online” is confirmed the ceiling fan and lights are ready to be directly controlled by the smart phone in an interface as follows:
2.4 The ceiling fan can also be controlled by a smart phone via Internet. The fan needs to be linked to a router first.
Press the Menu button (3 horizontal bars at the top-right-corner) to bring up a setup menu. Press “Switching Mode” button to bring up the router setup window. Enter the name of your router and password of your router. Press “Confirm” button to link to the ceiling fan.
Pressing the Refresh button (a circle with an arrow at the top-right-corner) will update the status. If the status shows “Telnet Online” or “LAN Online” the fan has been successfully linked to the router. When the router is connected to the internet the status will show “Telnet Online” and the fan can be controlled anywhere as long as internet access is available. When the router is not connected to the internet the status will show “LAN Online” and the fan can only be controlled within the coverage range of the router.
2.5 Password Change: Press the Menu button (3 horizontal bars at the top-right-corner) to gain access to the setup menu and then press “Change Password” button to bring up a window for password change.
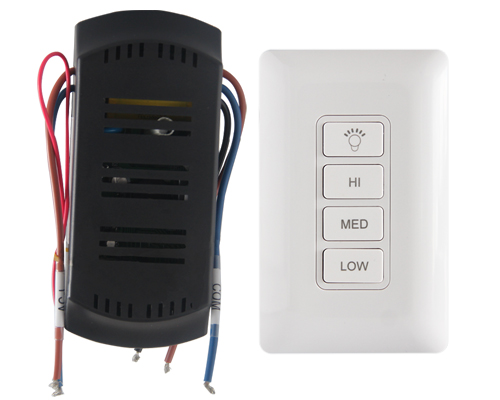
uCF691 WiFi/RF ceiling fan remote control kit consists of three pieces as shown in Fig. 1
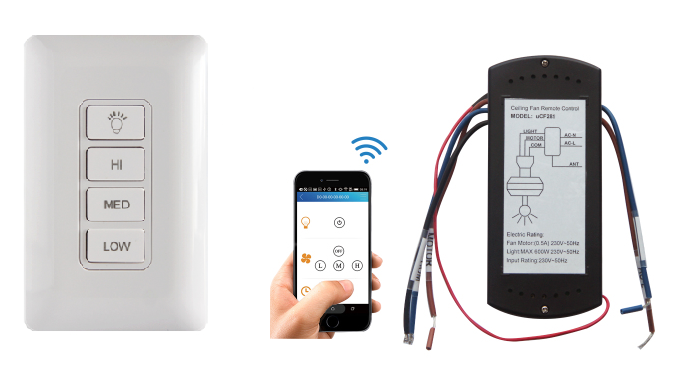 Fig. 1 uCF691 WiFi/RF Ceiling Fan Remote Control Kit
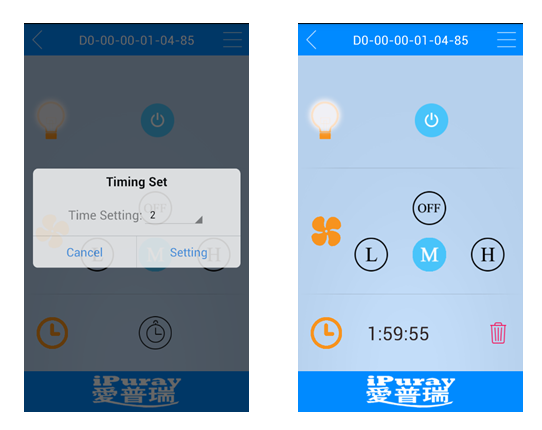
An RF 433MHz remote control unit which either can be hanged onto a wall mount base like a standard wall mount switch or can be detached from the wall mount base as a handheld device. Fig. 2 shows the phone interface for the uCF691 receiver A rectangular receiver that can receive control commands either from the remote control unit or a smart phone. This receiver uses existing wiring and can easily fit into the canopy of the ceiling fans; and An App to be loaded into a smart phone. This App will turn a smart phone into a remote control device with friendly user interface.
Fig. 2 The Fan Control Interface
Remote Control Unit:
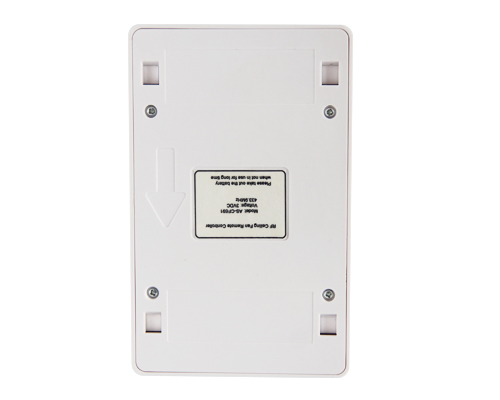
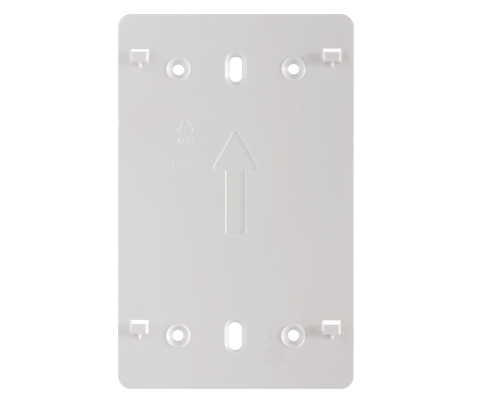
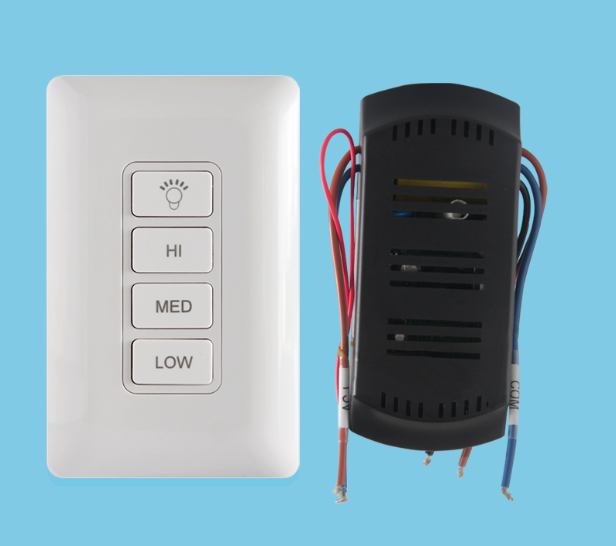
Fig. 3 shows the front view back view and wall plate of uCF691 remote control unit respectively. The remote control unit has four buttons on the front and has structural features on its back for easy attachment to a wall mount base (not shown here).
Fig. 3 uCF691 Remote Control Unit
The 4 buttons on the front have the following functions:
1. Turn on fan: The remote control unit has three buttons LOW MED and HI. Pressing each of these three buttons will turn on the fan and set the fan to low speed medium speed and high speed respectively.
2. Turn off fan: Long pressing either of the LOW/MED/HI button will turn off the fan.
3. Turn on or turn off light: Pressing the LIGHT button will turn on or turn off the lights.