

24-hour national service hotline
Please contact us for further information
contact>>date:2017-08-25 15:39

uCF280 is the smartest ceiling fan remote control kit. In addition to traditional RF 433MHz
remote control its receiver has a WiFi module built-in so that the ceiling fan can also be remotely controlled by a smart phone.
Good for all ceiling fans;
Two load outputs one for controlling the fan and another one for controlling the lights;
Three fan speeds;
Precise timer function;
Bidirectional communication enabling status display of fans lights and timer;
ABS-V0 flame resistance material; and
Elegant design and high quality build.
uCF280 WiFi/RF ceiling fan remote control kit consists of three pieces as shown in Fig. 1

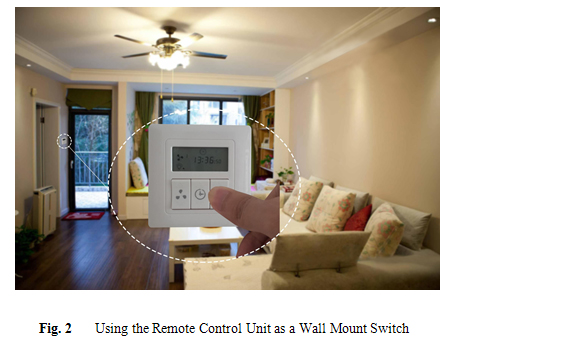
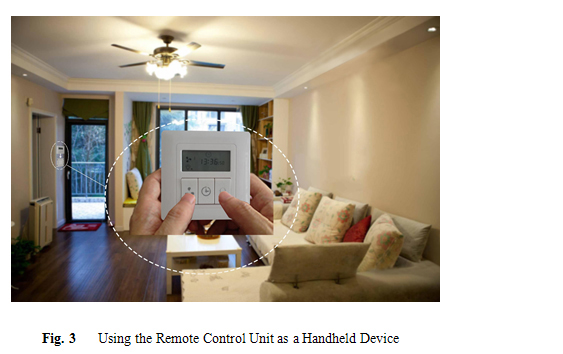
l An RF 433MHz remote control unit which either can be hanged onto a wall mount ba
like a standard wall mount switch or can be detached from the wall mount ba
handheld device. Fig. 2 shows the remote control unit used as a wall mount switch
while Fig. 3 shows the remote control unit used as a handheld device;
l A rectangular receiver that can receive control commands either from the remote control
unit or a smart phone. This receiver uses existing wiring and can easily fit into the
canopy of the ceiling fans; and
l An App to be loaded into a smart phone. This App will turn a smart phone into a remote
control device with friendly user interface.
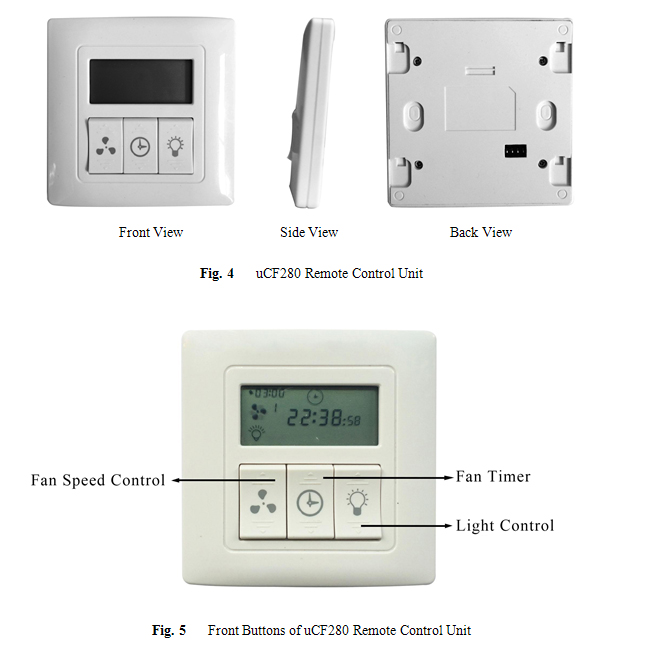
Remote Control Unit:
Fig. 4 shows the front view side view and back view of uCF280 remote control unit respectively.
The remote control unit has three buttons and an LCD display on the front and has structural
features on its back for easy attachment to a wall mount ba
As shown in Fig. 5 the 3 buttons on the front have the following functions:
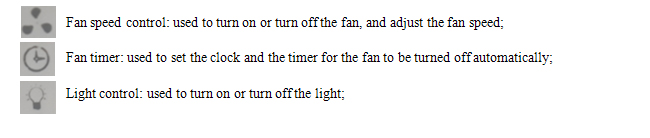
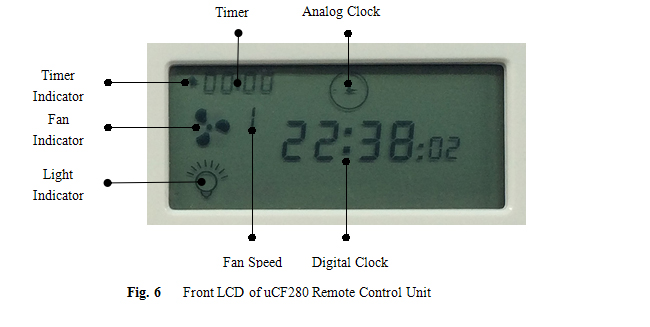
Fig. 6 is a large view of the LCD display of uCF280 remote control unit. The displayed parameters
include clock timer fan speed fan status and light status.
uCF280 remote control unit is battery driven and there is no wiring requirement. The receiver has
its all connection wires clearly labelled as shown in Fig. 7.
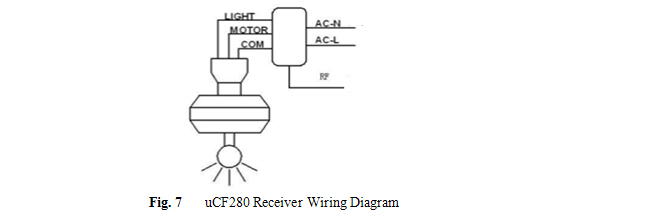
AC-L: Connected to the hot wire of power supply
AC-N: Connected to the neutral wire of power supply
Light: Connected to the lights
Motor: Connected to the fan
COM: Connected to the neutral wire of the fan and/or lights
RF: Antenna no connection
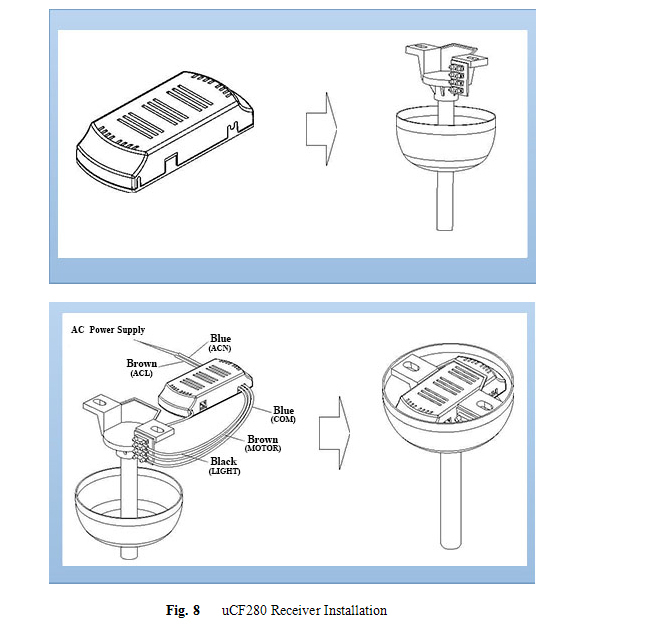
Warning: Please make sure power is turned off before starting installation!
Once properly wired the uCF280 receiver can be installed into the canopy of the ceiling fan as
shown in Fig. 8.
1. Setup and Operation of uCF280 Remote Control Unit:
There is a dip switch on the back of uCF280 remote control unit and there is a dip switch on
the side of uCF280 receiver. Set these two dip switches to identical positions. The remote
control unit will be able to send commands to the receiver and read the status from the
receiver.
1.1 Set up clock: Press and hold the fan timer button the displayed clock hours will start
flashing. Pressing the top of the button will increase the displayed numbers and pressing
the bottom of the button will decrease the displayed numbers. Press the button again the
displayed clock minutes will start flashing and be ready to be changed accordingly.
Once the clock is set pressing and holding the fan timer button will save the settings.
The clock starts to work. If there is no button operation for 10 seconds the settings will
be saved as well.
1.2 Change fan speed: Pressing the fan speed control button will turn on or turn off the
fan. When the fan is on pressing the top of the button will increase the fan speed and
pressing the bottom of the button will decrease the fan speed.
When the fan is on the fan indicator will be rotating. Also the fan speed display shows
the current fan speed: 0 (off) 1 (low speed) 2 (medium speed) and 3 (high speed).
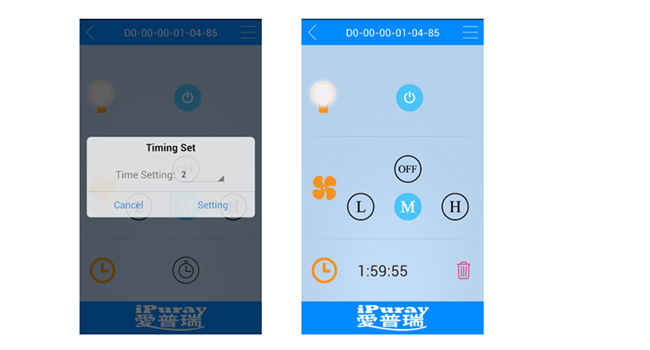
1.3 Set up timer: When the fan is on pressing the fan timer button the displayed timer
hours will start flashing. Pressing the top of the button will increase the displayed
numbers and pressing the bottom of the button will decrease the displayed numbers.
Once the timer is set pressing and holding the fan timer button will save the settings. If
there is no button operation for 10 seconds the settings will be saved as well. The
available timer hours are 1 hour 2 hours 3 hours 4 hours 5 hours 6 hours 7 hours and
8 hours respectively.
When the timer is activated the timer indicator is on and the timer starts countdown.
The fan will be turned off once the countdown timer runs out time.
The timer can be deactivated by setting the timer to 0.0 hour or by turning off the fan
using the fan speed control button.
1.4 Turn on or turn off the light: Pressing the light control button will turn on or turn off the
lights. When the light is on the displayed light indicator is on.
2. Setup and Operation of Smart Phone:
Please follow the instruction comes with the ceiling fan remote control kit to download a
smart phone App from the designated website. The steps of setting up the App are as follows:
2.1 Turn on the power to the ceiling fan. Load the App into smart phone and launch the App;

2.2 Click “Add Device” button enter Device ID and Password. Every receiver has a unique
ID assigned at factory and the default Password is 1234567. The password can be
changed by the user once the initial setup and operation are completed.
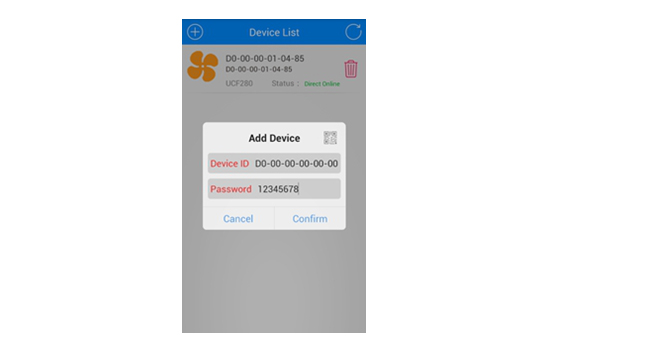
2.3 Press “Confirm” button to li
show “Device Online”. In case “ Device Online” is not shown press the Refresh button
(a circle with an arrow at the top-right-corner). Once “Device Online” is confirmed the
ceiling fan and lights are ready to be directly controlled by the smart phone in an
interface as follows:
2.4 The ceiling fan can also be controlled by a smart phone via Internet. The fan needs to
be li
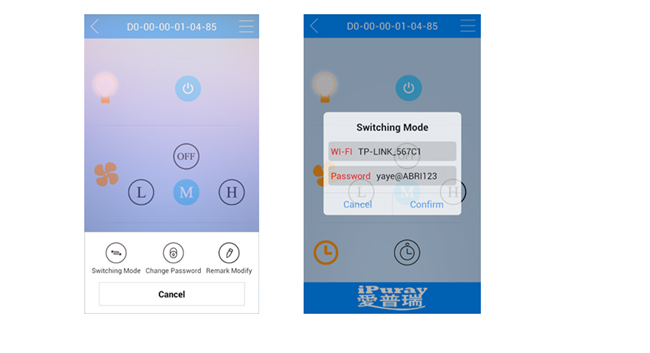
Press the Menu button (3 horizontal bars at the top-right-corner) to bring up a setup
menu. Press “Switching Mode” button to bring up the router setup window. Enter the
name of your router and password of your router. Press “Confirm” button to li
ceiling fan.
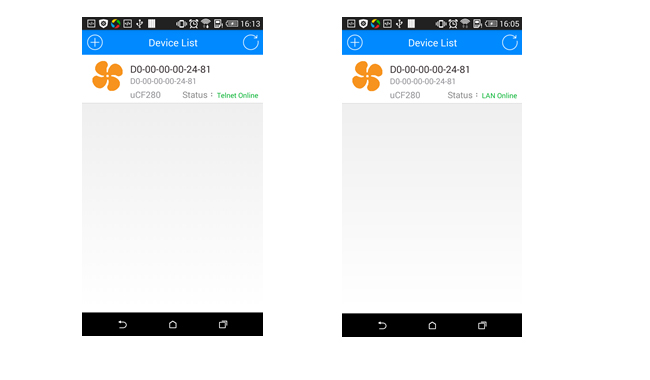
Pressing the Refresh button (a circle with an arrow at the top-right-corner) will update
the status. If the status shows “Telnet Online” or “LAN Online” the fan has been
successfully li
will show “Telnet Online” and the fan can be controlled anywhere as long as internet
access is available. When the router is not connected to the internet the status will show
“LAN Online” and the fan can only be controlled within the coverage range of the
router.
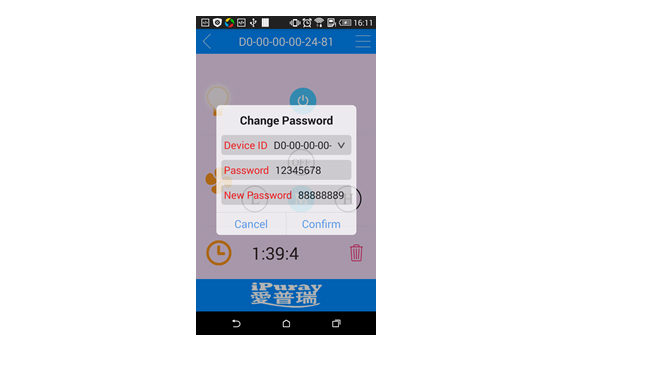
2.5 Password Change: Press the Menu button (3 horizontal bars at the top-right-corner) to
gain access to the setup menu and then press “Change Password” button to bring up a
window for password change.
uCF280 WiFi/RF ceiling fan remote control kit are good for all kind of ceiling fans even for retrofitting an older ceiling fan.
It can bring convenience and ease to our daily life and work.
They have wide applications at various locations such as homes restaurants conference rooms theatres etc.